Each step or operation in a Sequence, called a Block, corresponds to a measurement, configuration setting, or property from a launched bench application, such as a power supply or digital multimeter. Within Test Flow there are four primary types of blocks that can be used to build a Sequence – Set Block, Get Block, Sweep Block, and List Block.
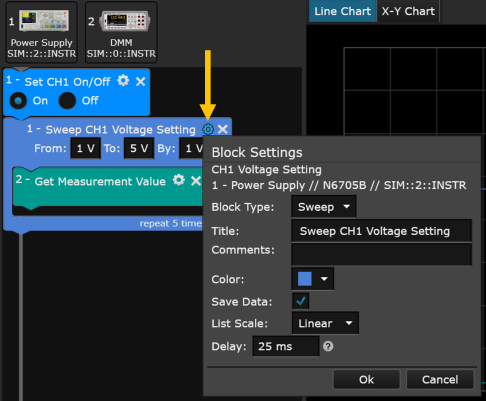
For most block types, you can click on the Settings menu icon in the upper right corner of the block to customize the block settings (see example below for a Sweep Block).
Note: The "More Blocks" panel provides access to additional Sequence block types to add delays, conditional looping, etc. See More Blocks Panel for more information.
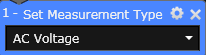
Set an instrument configuration or property such as the measurement function or range.
Settings Menu: The following parameters are available in the Settings menu for this block type.
| Type | Change the block type from 'Set' to 'Get'. | |
| Title | Change the title that appears at the top of this block. | |
| Comments | Add comments to the block. | |
| Color | Change the color of this block. The color of the corresponding information in the chart and table also change. | |
| Save Data | Save data generated by this block and display the data in the Results table. | |
| Delay | Insert a settling delay after this block. Specify a value between 0 seconds and 60 seconds (default is 25 ms). |
Retrieve a measurement or the current value of an instrument configuration or property.

Settings Menu: The following parameters are available in the Settings menu for this block type.
| Type | Change the block type from 'Get' to 'Set'. | |
| Title | Change the title that appears at the top of this block. | |
| Comments | Add comments to the block. | |
| Color | Change the color of this block. The color of the corresponding information in the chart and table also change. | |
| Save Data | Save data generated by this block and display the data in the Results table. |
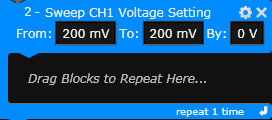
Step through a sweep from a start value to an end value at a specified interval. With each step, the individual blocks contained within the loop are executed.
Settings Menu: The following parameters are available in the Settings menu for this block type.
| Type | Change the block type from 'Sweep' to 'Set', 'Get' or 'List'. | |
| Title | Change the title that appears at the top of this block. | |
| Comments | Add comments to the block. | |
| Color | Change the color of this block. The color of the corresponding information in the chart and table also change. | |
| Save Data | Save data generated by this block and display the data in the Results table. | |
| List Scale | Change the sweep scale from Linear to Logarithmic. | |
| Delay | Insert a settling delay after this block. Specify a value between 0 seconds and 60 seconds (default is 25 ms). |
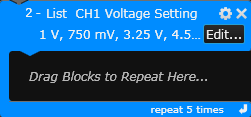
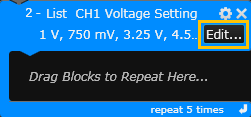
Step through a list of discrete values. With each step, the individual blocks contained within the loop are executed.
Settings Menu: The following parameters are available in the Settings menu for this block type.
| Type | Change the block type from 'List' to 'Sweep', 'Set', or 'Get'. | |
| Title | Change the title that appears at the top of this block. | |
| Comments | Add comments to the block. | |
| Color | Change the color of this block. The color of the corresponding information in the chart and table also change. | |
| Save Data | Save data generated by this block and display the data in the Results table. | |
| List Scale | Change the list scale from Linear to Logarithmic. | |
| Delay | Insert a settling delay after this block. Specify a value between 0 seconds and 60 seconds (default is 25 ms). |
To edit the list values, click the "Edit" button on the block.
From the "Edit List Values" dialog, you can add new values and edit or delete existing values.
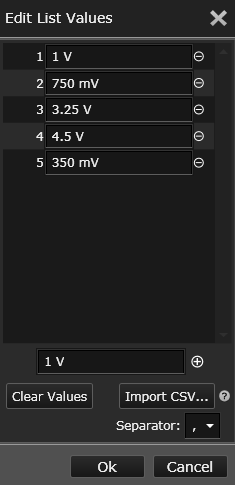
To add new values to the list, click  and enter the desired value. To delete existing values from the list, click
  next to the desired value. To delete all values from the list, click the "Clear Values" button.
You can also populate the list by importing data from an external comma-separated values (CSV) file – click the "Import CSV" button. Note that the imported data will overwrite the current values in the list. You can specify the data separators as commas or semicolons. The data in the external file should be contained within a single row or column within the worksheet.